
Ecommerce
Shopify product visuals
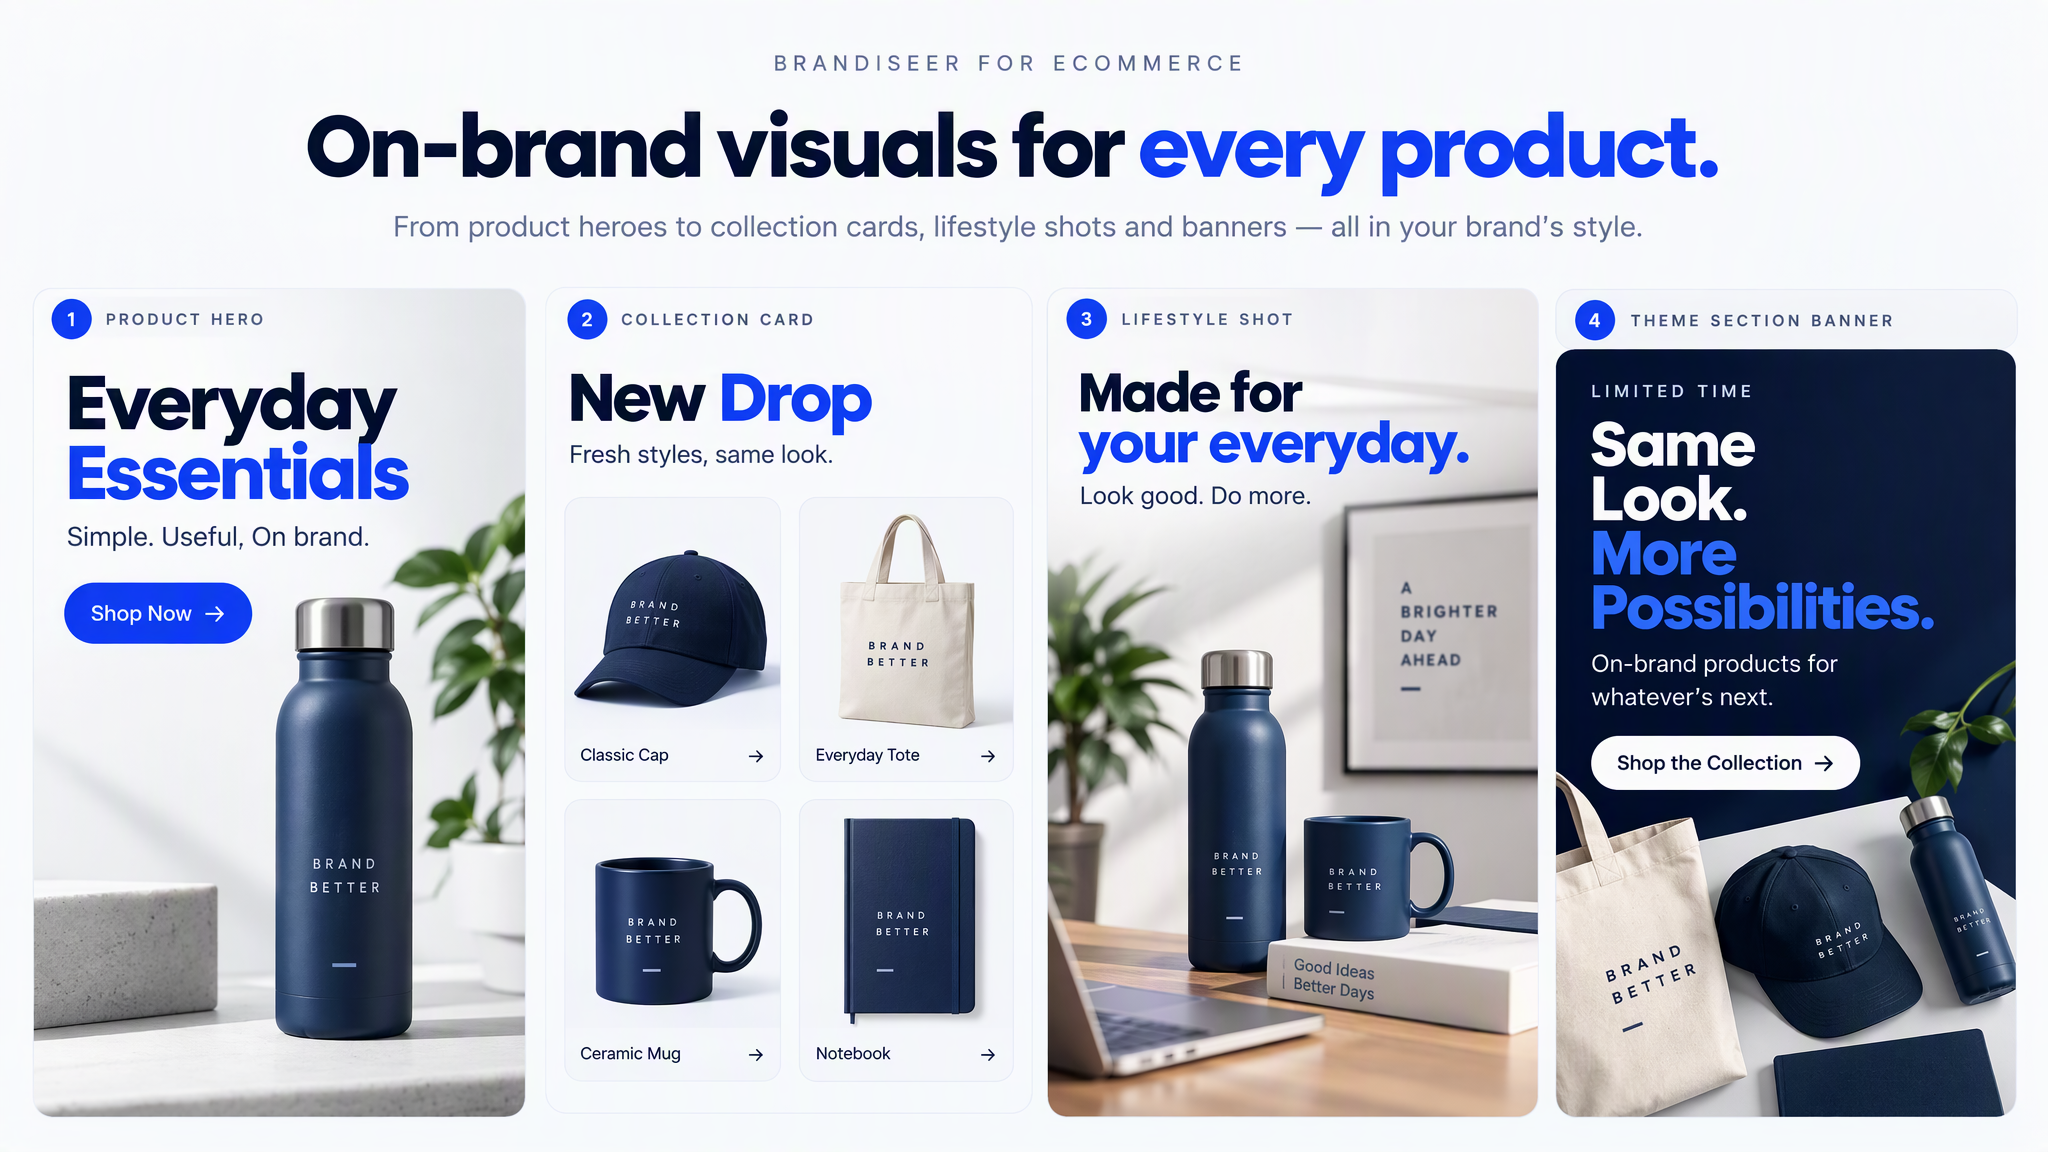
An agent generates on-brand PDP heroes, lifestyle stills, collection cards, and promo tiles with Brandiseer; a person places imageUrl in Shopify Files, product media, or theme sections. Brandiseer does not push into Shopify Admin and does not publish the storefront.
- BrandiseerBrand memory and on-brand stills via MCP or REST
- ShopifyFiles, product media, collection images, and theme sections. A person places the still.
- CursorAgent host for Brandiseer MCP or REST
- Claude CoworkAgent host for Brandiseer MCP or REST

Brandiseer + Shopify (+ Cursor or Claude Cowork)
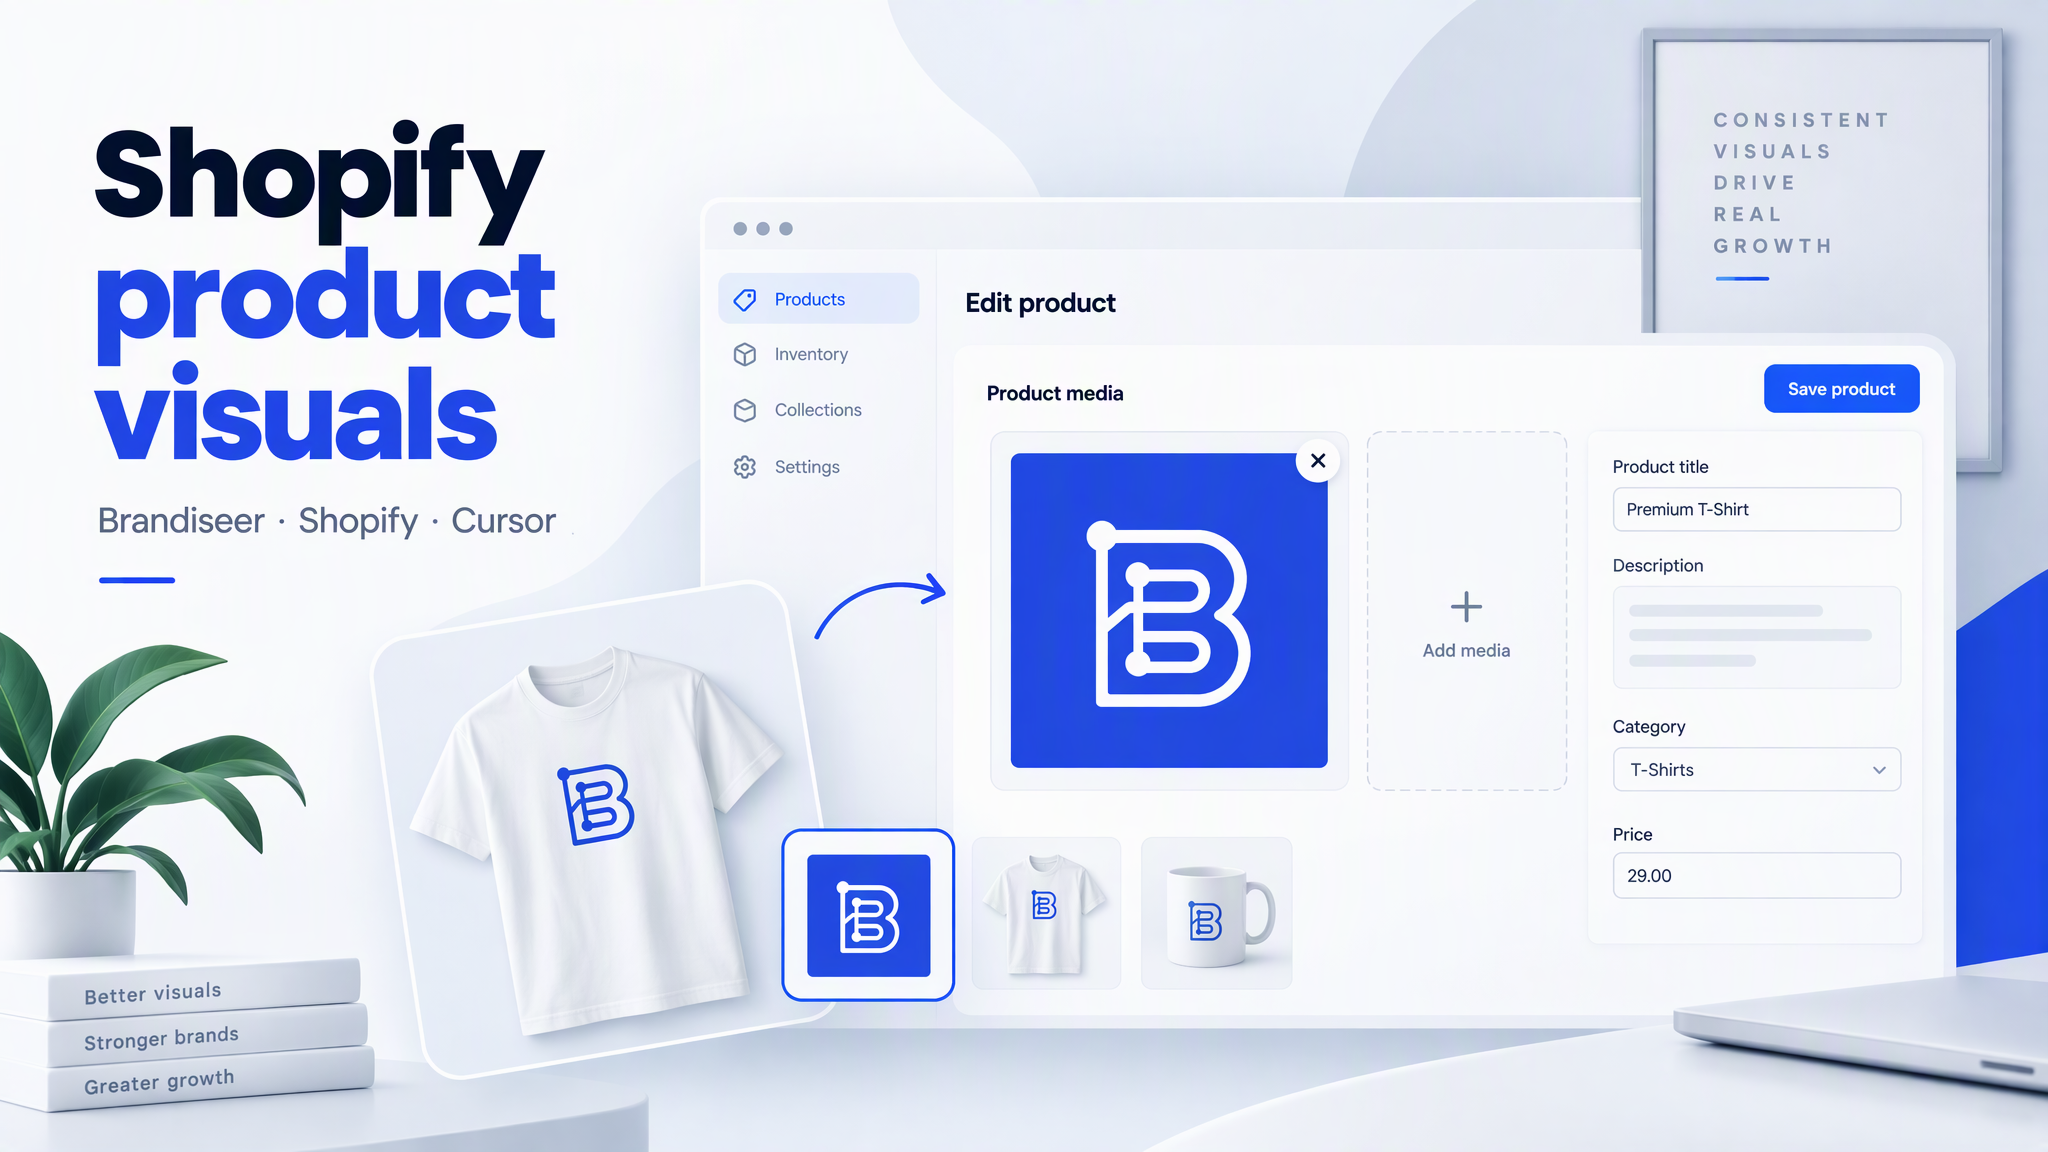
By the end of this guide you will have a repeatable way to make on-brand stills for a Shopify store. An agent in Cursor or Claude Cowork calls Brandiseer, gets an imageUrl for a PDP hero, a lifestyle still, a collection card, or a promo tile, and a person places that file in Shopify.
Brandiseer owns the brand memory and the still. Shopify owns the product, the collection, and the theme. Brandiseer does not open Shopify Admin, does not upload into Files or product media, and does not publish the theme or the product. A person downloads the file or copies imageUrl, then uploads it and assigns it. This guide does not call Shopify's Admin API and does not print Admin API paths.
People who brief stills inside Slack should use Slack creative desk. Recurring captions and Buffer scheduling should use Social media automation. Schedules and webhooks in Zapier, Make, or n8n should use Always-on creative automation. Site heroes that live in Webflow should use Webflow site visuals. HubSpot emails, landing pages, and ads should use HubSpot campaign creatives. Klaviyo email heroes should use Klaviyo email heroes. This guide does not recreate any of those. It is Shopify product and storefront placement only.
Who it's for
- Ecommerce and merchandising teams whose catalogue already lives in Shopify and who need a PDP hero, extra lifestyle frames, a collection image, or a theme promo tile without opening a separate design tool for every product
- Agencies that keep one Brandiseer Brand ID per client and one Shopify store per client
- Operators who can download an
imageUrland upload it in Shopify Admin, or paste that URL into the product media control Shopify's help page calls Add from URL
Ideal customer profile: a team whose products, collections, and theme already live in Shopify, whose brand already lives in Brandiseer, and whose missing piece is a brand-safe still plus a clear handoff into Files, product media, a collection image, or a theme section.
Why Brandiseer in this stack
Shopify is where the product page, the collection, and the theme are built. Cursor or Cowork is the agent that turns a merch brief into a layout. Brandiseer stores the logo and visual identity once, then applies that memory on every still. The prompt carries subject, layout, composition, and on-image text. It does not restate colours, fonts, mood, or visual style.
A Shopify catalogue drifts when every PDP image is a one-off export from a general image tool. Brandiseer keeps the still on the same brand as the rest of the range. Shopify still decides which product, collection, or section receives the file, and a person decides when that change is saved on a live product or published theme.
This is a different job from the sibling guides:
- Slack creative desk is a request-and-return desk. A person writes a brief in Slack and an agent posts a still back in the thread.
- Social media automation writes captions and schedules posts with Buffer.
- Always-on creative automation is the HTTP step in Zapier, Make, or n8n.
- Webflow site visuals generates site stills and hands
imageUrlto Webflow. - HubSpot campaign creatives generates campaign stills and hands
imageUrlto HubSpot. - Klaviyo email heroes generates email heroes and hands
imageUrlto Klaviyo. - This guide generates PDP heroes, lifestyle stills, collection cards, and promo tiles and hands
imageUrlto a person who places them in Shopify. Brandiseer does not push into Shopify Admin and does not publish the storefront.
Stack
| Layer | Tool | Role |
|---|---|---|
| Brand visuals | Brandiseer MCP and/or REST v2 | Generate on-brand stills. MCP uses Authorization: Bearer. REST uses X-API-Key: bds_... |
| Agent host (pick one) | Cursor | Read the product brief, call Brandiseer, return imageUrl and a placement note |
| Agent host (pick one) | Claude Cowork | Same contract as Cursor for interactive product stills |
| Store | Shopify | Files, product media, collection images, and theme sections. A person places the still. |
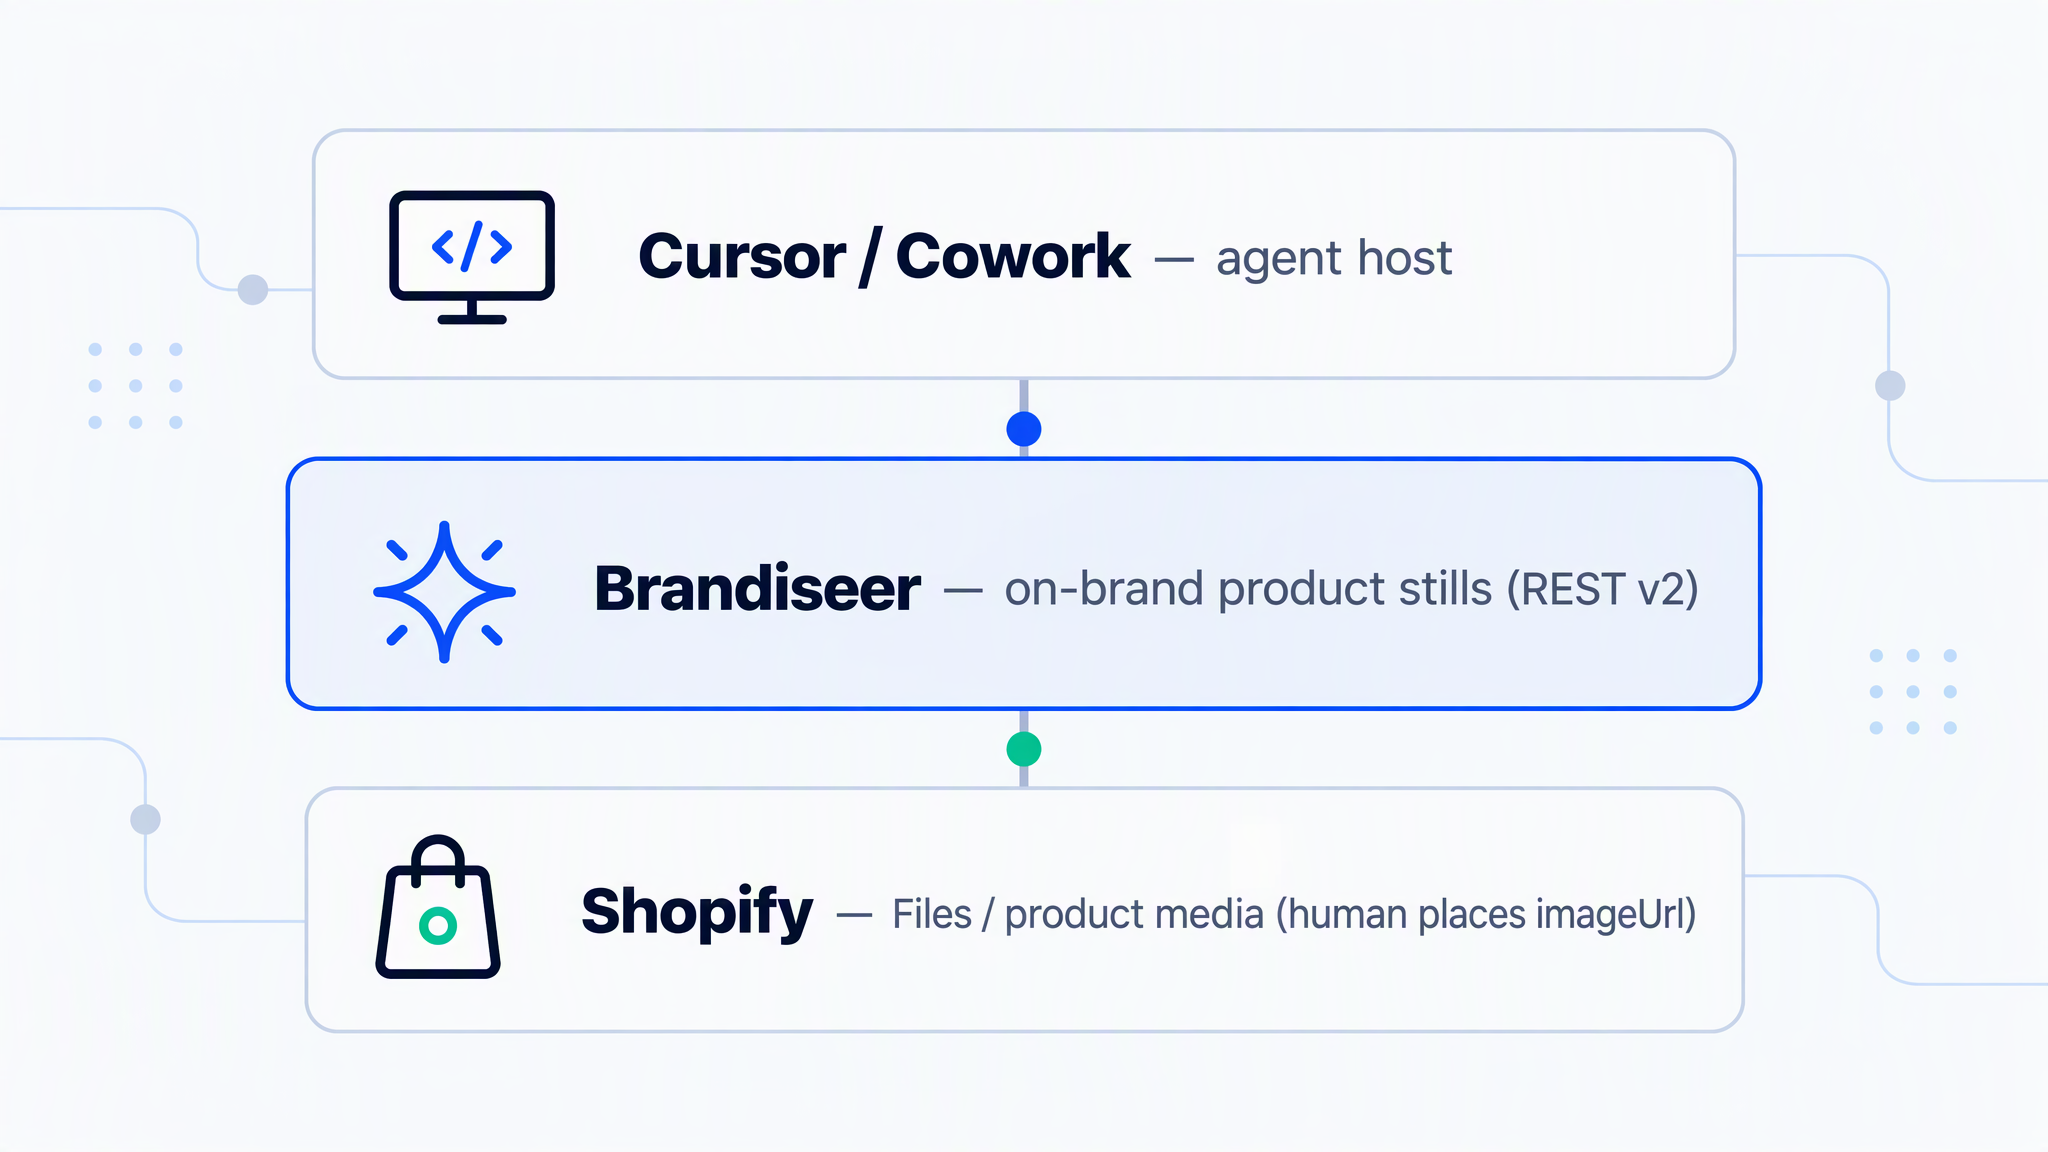
You only need one agent host. The Brandiseer contract is the same on both. Shopify has no Brandiseer app that drops a still onto a product. The handoff is an image URL or a download. A person places it.
Brandiseer docs: Developers · guide/docs · guide/image · Settings → API
Shopify docs: Uploading and managing files · Adding product media · Product media types · Adding alt text to media · Legacy manual collections · Editing collection details and layout · Uploading images (theme) · Duplicating themes
Use the clicks on those pages. Do not invent a neighbouring Admin API path. Shopify's help pages are the placement contract if a button label moves.
Endpoint tables and HTTP contracts are in API reference at the end of this guide.
Shopify (placement, not generation)
Three practical paths. A person does all of them. Use the one that matches the slot. Brandiseer stops at imageUrl.
- Files, then the product or the theme (library). In Shopify Admin, go to Content > Files and click Upload files. Select up to 20 files. Those files are then available in the admin, including as product media. This upload does not assign the file to a product, a collection, or a section. See Uploading and managing files. Shopify's caution on that page: only upload files intended for public access on the store. Do not upload confidential documents.
- Product media (PDP hero and lifestyle stills). On the product, the Media section can take Upload new, a drag-and-drop, Select existing, or Add from URL (open Select existing, then Add from URL, and paste
imageUrl). The first media item is the featured, or main, media. Shopify says that main item is displayed on collection pages, the cart page, the checkout page, and the home page. See Adding product media. - Collection image or theme section (collection cards and promo tiles). A collection card in this guide is the collection's own image, not a separate card field. A promo tile is an image on a theme section or block. Steps are in Setup stages 6 and 7. Neither step is a Brandiseer call.
There is no fourth path in this guide. Do not send a Shopify token to the agent. Do not publish the theme. Do not add the collection to sales channels during a smoke test.
How it works
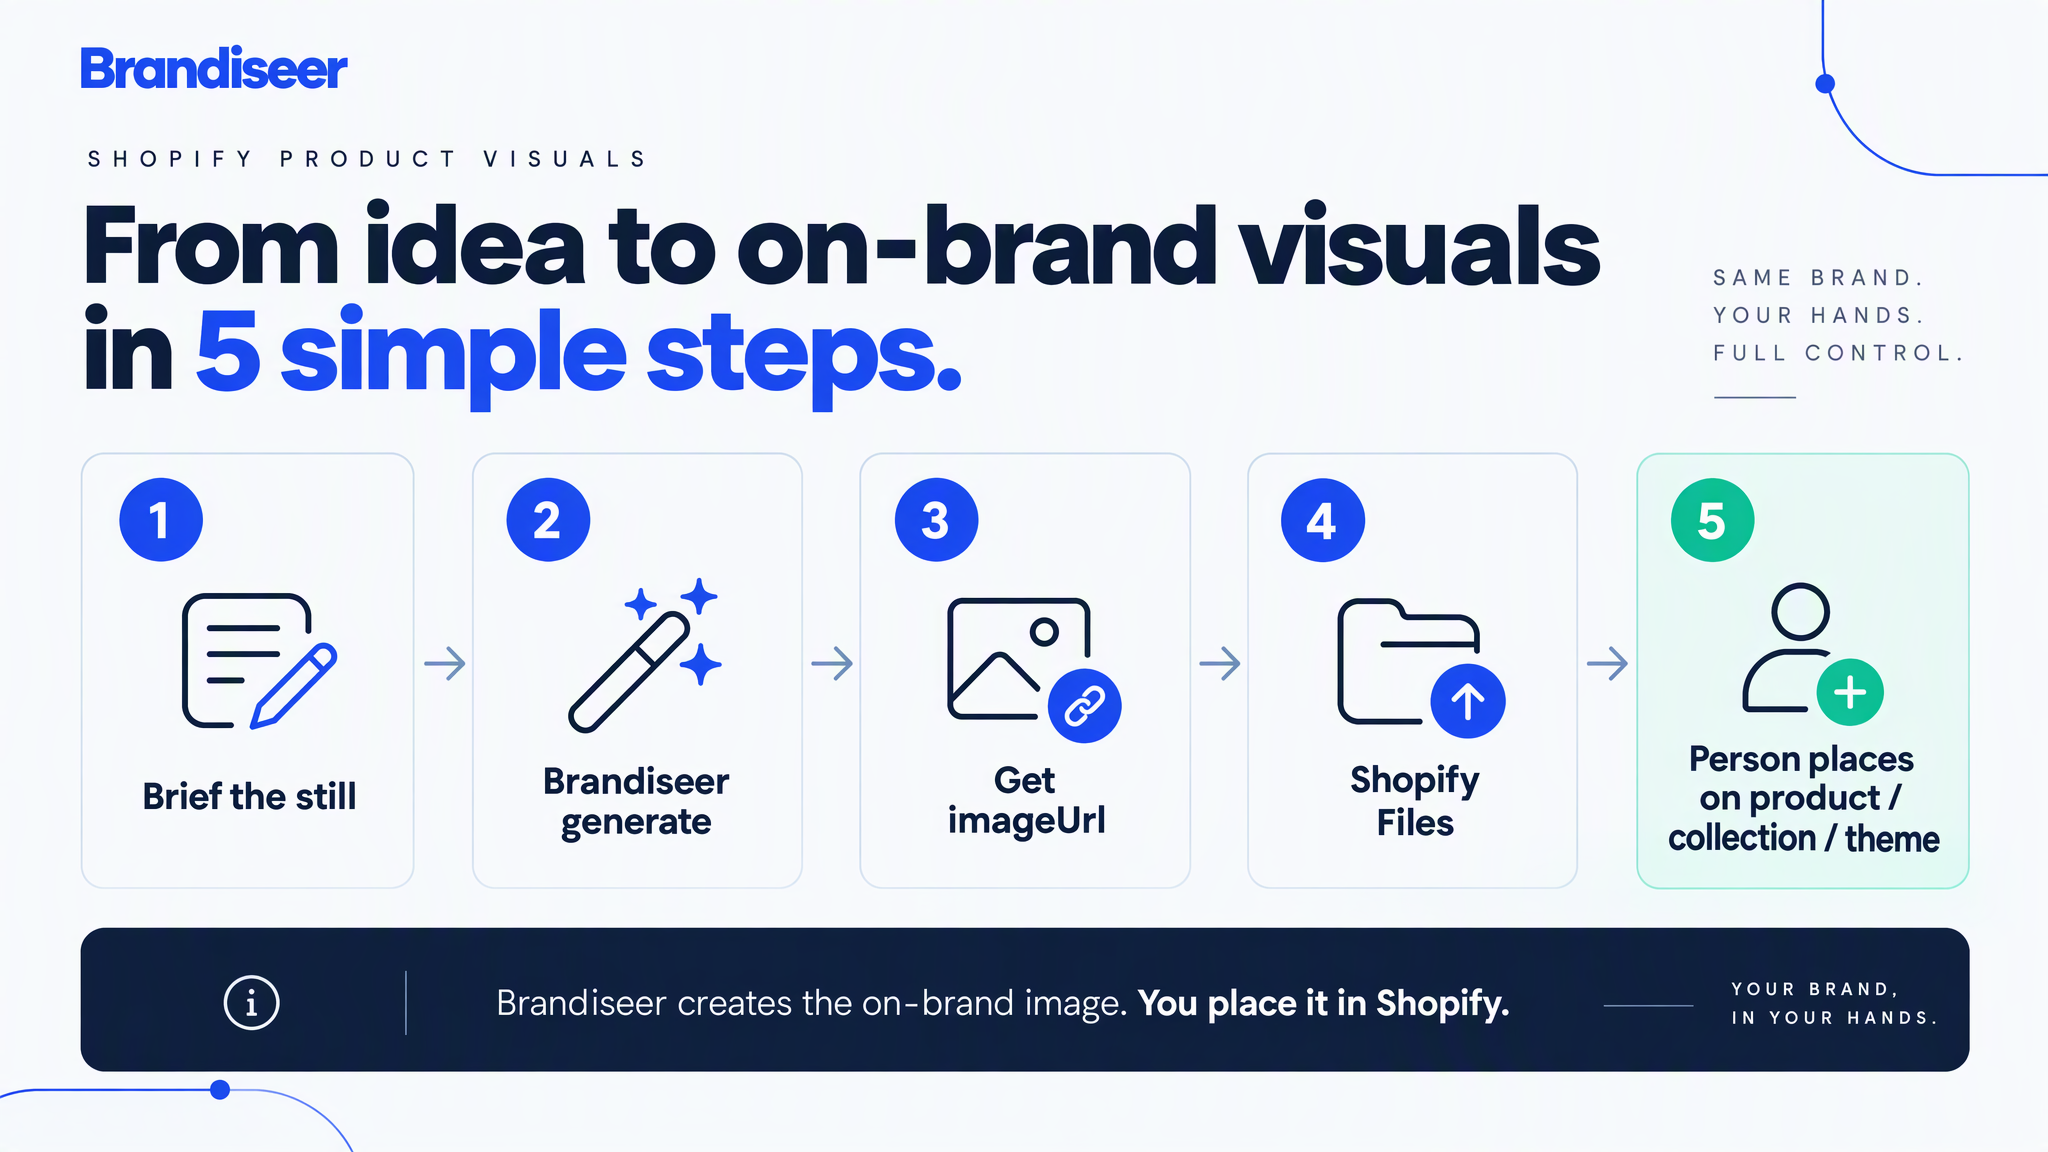
Architecture, from product brief to a still sitting in Shopify:
- You store the brand once in Brandiseer (logo and reference visuals teach the look).
- The agent host (Cursor or Cowork) has Brandiseer MCP or REST, the Brand ID (
bds_c_...), and the standing instructions in this guide. - You name the slot: PDP hero, lifestyle still, collection card, or promo tile. The agent rewrites that brief into subject, layout, and on-image text, then sets
aspectRatio,resolution,mode, anduseLogoas fields. - Brandiseer returns
imageUrl. The agent reports the URL, the crop, the mode, a one-line alt text suggestion, and a placement note (which product, collection, or theme section). It does not claim the Shopify admin changed. - A person downloads the file or pastes the URL into Add from URL, then places it. They leave the published theme and any live product's main media alone until they have reviewed the still.
Connect the workflow
Give the agent access to Brandiseer
Create an API key for the runnable setup, or connect the hosted MCP endpoint when your agent supports MCP.
What you need
- Company website URL, if the brand is not in Brandiseer yet
- Brandiseer account with at least one finished brand profile
- API key (
bds_...) from Settings → API or Developers - Brand ID (
bds_c_...) for every brand the agent may call - Credits for the stills you actually generate (see the table in Limits & FAQ)
- Cursor or Claude Cowork, with Brandiseer MCP or a way to call REST
- A Shopify store you can edit
- Access to Content > Files and to Products for the product you will update
- Access to Products > Collections if you will set a collection image. Shopify's legacy manual collections article says the Starter plan does not support collections. A higher plan is required for that slot.
- Access to Online Store if you will place a promo tile. Duplicate the theme first. See Duplicating themes. If the store already has 20 themes, that page says you must delete one before you can duplicate another. Deleting a theme is permanent.
This workflow does not need a Shopify API token.
Setup
Stage 1: Add your brand on Brandiseer
- Go to brandiseer.com. In the homepage input, enter your company website URL and click Try My Brand.
- Wait about one minute while Brandiseer analyses the site and picks a logo and visuals.
- Review those visuals carefully. They teach Brandiseer your look. Every later Shopify still is influenced by what you leave here.
- Remove anything off-brand (partner logos, stock, irrelevant screenshots). Add product photography that matches the look you want.
- Click Add Brand, sign up if prompted, then wait about 30 seconds for the brand profile to finish.
Agencies repeat this once per client. Do not point two Shopify stores at one Brand ID.
Stage 2: API key and Brand ID
- Open brandiseer.com/developers or Settings → API.
- Create an API key (
bds_...). Put it in the agent host's secret store. Do not paste it into a Shopify product, a theme, Slack, or a git repo. - Copy the Brand ID (
bds_c_...). - Confirm the key with
GET https://brandiseer.com/api/v1/creditsandGET https://brandiseer.com/api/v1/brands, headerX-API-Key. The credits JSON includescredits. The brands list includes each brandid. - Optional reachability check, no key required:
GET https://brandiseer.com/api/v1/healthreturns{ "status": "ok" }.
Read guide/docs and guide/image once while you write the standing instructions. Those pages are the live contract if a field name ever moves.
Stage 3: Connect Brandiseer to the agent host
Use Cursor or Cowork. One host is enough.
A. MCP
- Add the Brandiseer MCP server at
https://brandiseer.com/api/mcp. - Authenticate with
Authorization: Bearerand the API key, in the secret field your host provides. - Confirm the tool list shows
brandiseer_list_brands,brandiseer_check_credits, andbrandiseer_generate_image. If a fourth Brandiseer tool appears, ignore it until guide/docs documents it.
B. REST
- On Developers, open View Docs and use Copy for LLM if you want the reference inside the session.
- Tell the agent to prefer
POST https://brandiseer.com/api/v2/generateorPOST https://brandiseer.com/api/v2/generate/asyncwithX-API-Key. - If Design mode times out, switch that call to async and poll
GET https://brandiseer.com/api/v2/jobs/:jobIdevery 3 to 5 seconds.
Stage 4: Save the standing instructions
- Paste the System prompt from this guide into the Cursor rule or Cowork instructions that will run product stills.
- Fill the defaults the prompt asks for: Brand ID, default crops per slot, resolution, mode, and whether
useLogois on when the brief is silent. - Ask the agent to call
brandiseer_list_brands(orGET /api/v1/brands) and confirm the Brand ID exists before the first paid still.
Stage 5: Smoke test a PDP still in product media
- Ask for one PDP hero with a layout-only brief (the Spring hero in Example flows).
- Confirm the agent checked the brand, avoided colour and mood words, and returned
imageUrlplus crop, mode, and a placement note. Open the URL in a browser before you place it. - Download the file. Check it against the limits in Limits & FAQ before you upload. Rename it if the file name starts with a period, or if it ends with
pico,icon,thumb,testing,small,compact,medium,large, orgrande. Shopify's files article says those endings can be misread as image transforms, and Shopify then appends a suffix. - In Shopify Admin, go to Products and open a product you are willing to edit. In Media, either click Upload new and select the file, or click Select existing and then Add from URL and paste
imageUrl. You can also upload the file first under Content > Files, then come back and click Select existing. - Look at the order. The first item is the main media, and Shopify displays that item on collection pages, the cart, the checkout, and the home page. If the new still is first and you are only proving the handoff, drag the previous main image back to the first position. That drag is the documented way to change the main media.
- Add alt text: open the media item, click Add alt text, enter a short description (Shopify recommends 125 characters or fewer; the maximum on that page is 512), click Save alt text, then close the preview. See Adding alt text to media.
- Leave the product. Do not treat this smoke test as a catalogue launch.
- Send a second brief that only says "make the hero premium and moody". The agent should ask what is physically in the frame instead of generating.
If Add from URL rejects the address, download the file and use Upload new. The help page names the control. It does not list hostnames Brandiseer must use.
Stage 6: Collection card
Skip this stage unless the brief is a collection image. Shopify's product media article is about product media. A collection card here is the image on the collection itself.
The Starter plan does not support collections, per the legacy manual collections article. Upgrade before this stage if that is your plan.
Shopify's manual collections article says a new collections model is replacing the legacy manual and smart model, and that you can keep using manual collections until the new model is in your admin. Use the control the page you are on actually shows.
Collection that already has an image. Follow Editing collection details and layout:
- For a smoke test, duplicate a manual collection first. On Legacy manual collections, Duplicate adds
(copy)to the title, and the new collection is not on any sales channel until you publish it. Skip the sales-channel step. Click Save. - Go to Products > Collections and open the copy.
- Hover over the image, then click Change image.
- Select the image, click Done, then click Save.
New collection, legacy create flow. Follow Legacy manual collections. In the Collection image section, click Add image. That article points image sizes at Product media types. Click Save. In Sales channels, leave Online Store off until a person has reviewed the still. The same article documents a future publish date if you need the collection to stay hidden until a set time. Do not add a menu link during the smoke test.
Product tiles on a collection page use each product's main media, not this collection image. If the brief is "the thumbnail of the product inside the collection", that is the PDP hero path in stage 5, and the first media item is what Shopify says it shows on collection pages.
Stage 7: Promo tile on a theme section
Skip this stage unless the brief is a banner, slideshow, or other theme image. Do this on a duplicate theme so you are not editing the published theme.
- Duplicate the theme. From Online Store, open the actions menu on the theme and click Duplicate. The copy is named Copy Of plus the theme name. See Duplicating themes.
- On that copy, click Edit theme. If the still belongs on a template other than the home page, use the Home page drop-down and select that template.
- In the sidebar, click the section or block that has an Image field. The section name depends on the theme. This guide does not invent a section called "Promo tile".
- In the Image field, click Select image > Add images, open the file from your computer, and click Done. The uploading-images article also offers Explore free images for Burst stock. Do not use Burst for this workflow.
- Click Save on the duplicate. Do not publish the theme.
Full clicks: Uploading images. That article says slideshow and background images should not contain text, because the theme can crop or move it. Put headlines in the theme's text settings. Tell the agent "empty region" for that area.
The same article says you can set a focal point so the important part stays in frame when the theme crops. One focal point applies everywhere that file is used. Open the image from Content > Files, the theme editor, or the product Media section, click the point (or drag the blue dot), and click Save. Focal points are documented for listed free-theme versions. Check the theme if it is a third-party theme.
Prompting rules for Brandiseer images
When the agent builds prompt:
- Keep subject, layout, composition, and on-image text (what the words say and where they sit).
- Never send brand colours, fonts, mood, or visual style. Brand memory already applies those. Style words fight the brand and produce off-brand stills.
- Put crop in
aspectRatio, quality inmode, pixel size inresolution, and logo on/off inuseLogo. Those are body fields, not prompt prose. - Map the Shopify slot to a documented Brandiseer ratio. PDP hero, lifestyle still, and collection card:
1:1. Shopify's product media types page says a square product image of 2048 x 2048 px usually displays best, and that main images on collection pages should share one aspect ratio. Promo banner or slideshow:16:9, with no on-image text, because the theme article says theme crops can move text. A landscape card the human names as 4:3:4:3. Portrait only if the brief asks:9:16. Brandiseer does not offer a theme-specific crop. The theme or a focal point does the rest. - Prefer
designfor finished product stills.fastis the API default if you omitmode, and it is the right fallback if a design job fails once. - Prefer
2Kso a square still sits near the 2048 px size Shopify names.1Kis the fallback when a file would miss a size cap.4Kis optional. Check the downloaded file against the Shopify limit for that surface before upload. - Set
useLogotrue only when the brief asked for a logo (or your default says so). Headlines that a theme text block will render should stay off the image. Say "empty region" for that area instead of describing a font. - Full rules: Prompt compatibility.
System prompt
Paste this into Cursor or Cowork as the standing instructions for Shopify product stills. Replace the placeholders before the first generate.
You generate on-brand PDP heroes, lifestyle stills, collection cards, and
promo tiles for Shopify. Brandiseer returns an image URL. You do not push
pixels into Shopify Admin, and you do not publish the storefront.

Brandiseer:
- MCP: https://brandiseer.com/api/mcp with Authorization: Bearer.
  Tools you may call: brandiseer_list_brands, brandiseer_check_credits,
  brandiseer_generate_image. Do not invent tool names.
- REST: X-API-Key: bds_... (secret store only).
  Prefer POST https://brandiseer.com/api/v2/generate
  or POST https://brandiseer.com/api/v2/generate/async
  then poll GET https://brandiseer.com/api/v2/jobs/:jobId every 3 to 5 seconds
  until data.status is done or failed, or about 10 minutes have passed.
- Live contract: https://brandiseer.com/guide/docs and
  https://brandiseer.com/guide/image

Defaults for this store (fill in once):
- Brand ID: bds_c_...
- PDP hero, lifestyle still, and collection card aspectRatio: 1:1
- Promo banner aspectRatio: 16:9
- mode: design
- resolution: 2K (use 1K if a file would miss Shopify's size cap)
- useLogo when the brief is silent: false
- Multi-brand map, if any: brand name to bds_c_...

On every request:
1. Resolve brandId from the brief or the default. If more than one brand
   exists and the brief does not name one, ask. Never fall through to
   another client's Brand ID.
2. Check credits before a batch (brandiseer_check_credits or
   GET https://brandiseer.com/api/v1/credits). A single still can proceed
   if the last known balance covers the mode and resolution in the table
   you were given. On 402, stop.
3. Rewrite the brief into subject, layout, composition, and on-image text.
   Strip colours, fonts, mood, and visual style. If stripping leaves no
   physical subject, ask what is in the frame. Do not generate.
4. Choose aspectRatio from the slot. Put resolution, mode, and useLogo in
   API fields, not in the prompt. Do not invent a theme pixel size.
5. Generate one still. Return imageUrl, aspectRatio, mode, resolution,
   useLogo, a one-line alt text suggestion (125 characters or fewer),
   and a placement note: product media (name the product), collection
   image (name the collection), or theme section on a duplicate theme.
6. Do not tell the user the Shopify catalogue changed unless they confirm
   they placed the file. Do not publish a theme, a product, or a collection.

Shopify placement is human only:
- Files: Content > Files, Upload files. Public store files only.
- Product media: Upload new, Select existing, or Select existing then
  Add from URL. The first media item is the main image Shopify shows on
  collection pages, cart, checkout, and the home page.
- Collection image and theme Image fields: the person uploads a file.
  Promo text belongs in the theme, not on the image, when the theme crops.
- Do not call the Shopify Admin API. Do not invent API paths. Do not ask
  for a Shopify token.

Out of scope:
- Slack replies, Buffer scheduling, and Zapier, Make, or n8n scenarios.
- Webflow site placement, HubSpot files or ads, and Klaviyo email placement.
- Prices, inventory, SKUs, and product descriptions.
- Legal approval of claims, prices, or offers printed on the image.
- GET https://brandiseer.com/api/v1/usage (browser session only).
Prompt rewriter
Use this when a brief arrives as messy notes. It does not call Brandiseer. It only cleans text before you put it in prompt. The word list is a starting filter, not an official dictionary. If a phrase still describes colour, type, mood, or look, delete it by hand.
// Local rewriter for a Cursor or Cowork helper script.
// Keeps subject, layout, composition, and on-image text.
// Strips colour, type, mood, and visual-style language.

const STYLE_WORDS =
  /\b(colou?rs?|palette|hex|fonts?|typefaces?|typography|serif|sans-serif|moods?|vibes?|aesthetics?|minimalist|luxury|playful|cinematic|pastel|neon|gradients?|moody|elegant|premium|on-brand)\b/gi;

const SLOT_TO_RATIO = {
  pdp: "1:1",
  hero: "1:1",
  product: "1:1",
  lifestyle: "1:1",
  collection: "1:1",
  card: "1:1",
  square: "1:1",
  "1:1": "1:1",
  promo: "16:9",
  banner: "16:9",
  slideshow: "16:9",
  tile: "1:1",
  "16:9": "16:9",
  landscape: "4:3",
  "4:3": "4:3",
  portrait: "9:16",
  "9:16": "9:16",
};

function rewriteBrandiseerPrompt(input) {
  const headline = String(input.headline || "").trim();
  const subject = String(input.subject || input.brief || "").trim();
  const slotKey = String(input.slot || input.crop || "").trim().toLowerCase();
  const aspectRatio = SLOT_TO_RATIO[slotKey] || "";

  let prompt = [subject, headline ? `On-image text: "${headline}".` : ""]
    .filter(Boolean)
    .join(" ");

  prompt = prompt
    .replace(/#[0-9a-f]{3,8}\b/gi, " ")
    .replace(STYLE_WORDS, " ")
    .replace(/\s+/g, " ")
    .trim();

  return {
    prompt,
    aspectRatio,
    needsSubject: prompt.length < 12 || !aspectRatio,
  };
}
If needsSubject is true, ask the human for a subject and a slot. Do not POST.
Add-ons
Add these after the PDP smoke test passes. They do not change Brandiseer's image contract, and they do not give Brandiseer a publish button.
Approval before the still is the main media
After imageUrl is in the product Media section, a named reviewer checks the still and the alt text. Only then may someone drag it to the first position, where Shopify uses it on collection pages, the cart, the checkout, and the home page. Until that happens, keep the previous main image first. Brandiseer does not approve legal claims, prices, or offers.
A theme promo stays on the duplicate until that same reviewer is happy. Publishing the theme is a separate admin action. This guide does not publish it.
One brand per Shopify store
Keep a table: store name and bds_c_.... Require a store name on every brief when more than one store exists. If the name misses, stop and list the stores you configured. Confirm Brand IDs with GET /api/v1/brands. Never fall through to another client's Brand ID. There is no Shopify token in this table, because this guide does not call Shopify.
Credit soft-limit
When credits is under a threshold you choose (for example 40), switch new product stills to mode: fast and resolution: 1K, or skip them. Fast at 1K costs 4 credits. An explicit "run anyway" from the human can override the skip. The threshold is yours, not a Brandiseer default.
Placement log
Keep a short note next to the work: store, product or collection or theme, slot, brandId, mode, aspectRatio, resolution, imageUrl, and whether it was uploaded, pasted with Add from URL, or left only in Files. Brandiseer does not write this log. Shopify does not send it back to Brandiseer.
Variant image (one frame, already on the product)
Shopify's variant article says you can assign one image to a variant, chosen from existing product images or uploaded from the device. Variants do not take 3D models or video. Add the lifestyle stills to the product gallery first, then assign one of those images to the variant. That assignment is a person in the Variants section. Read Adding images to product variants before you do it. Brandiseer does not map variants.
Handoff to the sibling guides
- Stills requested in Slack, returned in a thread: Slack creative desk.
- Captions and a Buffer schedule: Social media automation.
- A Zapier, Make, or n8n trigger that should deliver
imageUrlon a schedule: Always-on creative automation. - A homepage hero that lives in Webflow: Webflow site visuals.
- An email header, landing page, or ad that lives in HubSpot: HubSpot campaign creatives.
- An email hero that lives in Klaviyo: Klaviyo email heroes.
Do not embed Buffer, a Slack desk, an always-on scenario, Webflow, HubSpot, or Klaviyo inside this Shopify guide.
Optional motion (not the product MVP)
Shopify product video is a different upload from a still. The product media types page lists video length up to 10 minutes, size up to 1 GB, resolution up to 4K (4096 x 2160 px), and file types .mp4, .mov, or .webm. YouTube or Vimeo links are the other option on that page. A theme must support video. This guide does not generate that file and does not publish it.
Brandiseer video is a separate contract. Generate the still first, then send its public imageUrl to POST https://brandiseer.com/api/v2.1/video/generate. Poll GET https://brandiseer.com/api/v2.1/video/jobs/:jobId. Video jobs use status completed and a videoUrl, which is different from image jobs (done and imageUrl). Read guide/video for tier, duration, and resolution before you enable this. Video credits are per second and are not the still table below. A video failure does not undo the still. Leave this off unless the brief explicitly asks to animate, and still do not publish the product from this guide.
Limits & FAQ
Does Brandiseer update Shopify or publish the storefront?
No. Brandiseer returns imageUrl. A person uploads that file or pastes the URL into product media, sets a collection image, or adds it to a theme section on a duplicate theme. Saving a live product's main media, publishing a theme, and publishing a collection to a sales channel stay in Shopify, after a person reviews the still.
Is there a Brandiseer app inside Shopify?
No. There is no Brandiseer block in the theme editor in this guide. Do not look for a native "send to Shopify" button on the Brandiseer side.
What if Shopify rejects the image?
Check the page for the surface you are uploading to. The numbers are not identical across Shopify's help pages:
- Uploading and managing files: images up to 20 MB and 25 megapixels. Formats JPEG, PNG, WEBP, HEIC, and GIF. Aspect ratio between 100:1 and 1:100. File names must not start with a period. Names that end in
pico,icon,thumb,testing,small,compact,medium,large, orgrandecan be rewritten by Shopify's CDN. - Product media types: product and collection images up to 5000 x 5000 px, or 25 megapixels, and smaller than 20 MB. It names PNG as the best type for most product images, then JPEG, and also lists PSD, TIFF, BMP, GIF, SVG, HEIC, and WebP.
- Uploading images: says images uploaded to Shopify cannot exceed 20 megapixels or 20 megabytes. The same page also tells you to upload higher-resolution files up to 5000 x 5000 px or 25 megapixels for quality. If the theme editor rejects the file, reduce the pixel size. The page lists JPEG, progressive JPEG, PNG, GIF, HEIC, and WebP, and says PSD, TIFF, and BMP are accepted and converted to JPEG or PNG.
Prefer 2K, download the file, and confirm size before upload. If Add from URL fails, upload the file from your computer. A product can hold up to 250 media items.
Which Shopify actions are in this guide?
Only human steps confirmed on Shopify's public help pages:
- Content > Files, Upload files, up to 20 files at a time, on Uploading and managing files.
- Product Media: Upload new, drag and drop, Select existing, and Select existing then Add from URL, on Adding product media. Drag the chosen image to the first position only when it should be the main media.
- Alt text: open the media, Add alt text, Save alt text, on Adding alt text to media.
- Collection image: Add image on create, from Legacy manual collections, or hover and Change image from Editing collection details and layout.
- Theme image: duplicate the theme, Edit theme on the copy, Select image > Add images, Save, from Uploading images and Duplicating themes.
This guide does not call Shopify's Admin API and does not list those paths. It does not publish the theme.
Can the agent use a Shopify token or Sidekick?
No. This workflow has no Shopify token. Shopify's collection layout page mentions Sidekick for sorting products in a collection. This guide does not use Sidekick to place images or to publish.
Where does the key live?
Only the Brandiseer key (bds_...) is in play. It lives in the agent host's secret store. Never in a product description, a theme setting, a Slack message, a prompt you commit, or a git repo. Rotate it if it leaks. Poll a Brandiseer job with the same key that submitted it.
What do stills cost?
Credits per still. Failures refund. Async submits deduct immediately and refund if the job fails.
| Mode | 1K | 2K | 4K |
|---|---|---|---|
| Fast | 4 | 6 | 8 |
| Design | 5 | 6 | 8 |
| Pro | 6 | 8 | 10 |
402 means not enough credits. Pricing context: brandiseer.com/pricing.
Why is the still off-brand?
Almost always because the prompt contained colours, fonts, mood, or visual style. Strip them and generate again. See guide/image.
Shopify's uploading-images article also says embedded colour profiles are removed when the image is displayed, and that browsers then assume sRGB. A shift after upload can be that removal. It is separate from an off-brand prompt.
Why does the crop look wrong on the storefront?
Brandiseer aspect ratios are 1:1, 16:9, 9:16, and 4:3. Themes crop banners and collection grids. Generate the PDP and the collection image at 1:1, and a wide promo at 16:9, then set a focal point if the theme cuts the frame. Do not ask Brandiseer for a custom pixel size inside the prompt.
How long can I poll?
About 10 minutes, then the Brandiseer job expires. Poll every 3 to 5 seconds. Stop on done or failed as well. Do not start a second job for the same slot while the first is still open, or you will pay twice.
Which generate URL should new product work use?
POST /api/v2/generate when the agent host waits long enough. POST /api/v2/generate/async when it does not. Legacy POST /api/v1/generate remains for older callers and only supports Fast and Pro via proMode boolean.
Does the agent approve claims on the image?
No. If the still has a price, a discount, or a legal line, a person reads it before that image becomes the main media or the theme is published. Brandiseer does not review the claim.
Does uploading to Files publish the product?
No. Content > Files stores the file. Shopify's own caution is that those files are for public store use, so treat the file URL as public. Assignment to a product, a collection, or a theme section is a later human step.
Demo / motion
Motion brief only. This is not an embed, and there is no walkthrough URL yet.
Working title: Shopify product visuals Length: 45 to 75 seconds
Story beats:
- A person asks Cursor or Cowork for a PDP hero with a layout-only brief
- The agent calls Brandiseer (MCP or REST v2) and shows an on-brand still
imageUrlis uploaded to a product's Media section, and the previous main image stays first- Optional cut: the same kind of still is placed on a duplicate theme section, still unpublished
- A human reviews alt text and leaves publish for a later step
On screen: the agent transcript with the prompt (no colour or mood words), one finished still, and the Shopify Media section. Blur the Brandiseer API key. Do not show a published theme, and do not show a fake video player in the guide.
Example flows
Flow A: PDP hero, placed in product media
The brief: "PDP hero for the spring kit. One product, centred, full item in frame. No words on the image. No logo."
The agent selects the default brandId, sets aspectRatio to 1:1, mode to design, resolution to 2K, and useLogo to false, and returns imageUrl plus alt text such as "Spring kit, centred, full item in frame". You open the URL, download it, and on the product click Upload new or Add from URL. You check it is not stuck in the first position unless you mean it to be the main media. You add alt text. You do not launch the product from this step.
Flow B: Lifestyle stills for the same product
The brief lists three frames: the kit on a table, the kit open, and the kit in a hand. Each one says what is physically in the frame and that there is no on-image text. The agent generates three 1:1 stills and labels them. You upload three files into Media and leave the existing main image first. Three Design 2K stills cost 18 credits if all succeed. Failures refund.
Flow C: Collection card, unpublished copy
The brief: "Collection image for Summer kits. Three products in a row. No words on the image."
You duplicate the collection so the copy is not on a sales channel. The agent returns a 1:1 still. You use Change image on the copy, click Save, and do not add Online Store. Product thumbnails inside the collection stay on each product's main media.
Flow D: Promo banner on a duplicate theme
The brief: "Homepage banner. Product on the left. Leave the right half empty. The theme heading will sit there. No words on the image."
The agent uses 16:9 and says the headline stays in the theme. You duplicate the theme, Edit theme on the copy, Select image > Add images, then Save. You do not publish the theme. If the theme crops the banner, set a focal point on the product rather than baking type into the file.
Flow E: Credit check before a product set
Before Flow A and Flow B together, the agent calls brandiseer_check_credits or GET https://brandiseer.com/api/v1/credits and reads credits. Four Design 2K stills need 24 credits. If the balance is lower, it stops or switches the batch to fast at 1K (4 credits each) only if you asked for that fallback. GET /api/v1/usage is a browser session endpoint. Do not call it from the agent.
Flow F: Style-only brief
The brief: "Make the PDP feel premium and moody."
The agent does not generate. It asks which product, what is physically in the frame, whether any words must appear on the image, and whether the logo is on. Colour, font, and mood stay out of the prompt.
Related use cases
- Klaviyo email heroes: on-brand email heroes placed in Klaviyo by a person
- HubSpot campaign creatives: on-brand stills placed in HubSpot emails, landing pages, and ads
- Webflow site visuals: on-brand stills placed in Webflow Assets or CMS image fields
- Always-on creative automation: Zapier, Make, or n8n calls Brandiseer REST and delivers
imageUrldownstream - Slack creative desk: people request stills in Slack and get them back in-thread
- Social media automation: on-brand images, captions, and Buffer scheduling
Links
Source
Public Use case README for Shopify product visuals. Brandiseer MCP and REST v2 image generation from Cursor or Claude Cowork, then a person places imageUrl in Shopify Files, product media, a collection image, or a theme section. Aligned with guide/docs and guide/image (23 September 2026). Shopify placement steps follow the public help pages linked above. Brandiseer does not push into Shopify Admin and does not publish the storefront. Distinct from Slack creative desk, Buffer social scheduling, Zapier, Make, or n8n always-on HTTP, Webflow site visuals, HubSpot campaign creatives, and Klaviyo email heroes.
API reference
Wiring reference for agents and HTTP modules. The sections above are the human path.
MCP (interactive stills in Cursor or Cowork)
Connect https://brandiseer.com/api/mcp with Authorization: Bearer and the API key. The only Brandiseer tools this guide uses are:
brandiseer_list_brandsbrandiseer_check_creditsbrandiseer_generate_image
Do not invent extra Brandiseer tool names. If the host needs explicit mode, aspectRatio, or async polling, use REST v2 below. Brandiseer MCP does not edit Shopify.
REST (prefer v2 images)
Send X-API-Key: bds_... on every authenticated Brandiseer call. There is no official SDK. Any HTTP client the agent host can run is enough.
| Call | What you get |
|---|---|
POST https://brandiseer.com/api/v2/generate | Sync still. 200 body { "imageUrl", "creditsUsed" }. Design mode often takes 40 to 70 seconds. |
POST https://brandiseer.com/api/v2/generate/async | 202 body { "data": { "jobId" } } (ids look like bds_job_...). Credits are deducted when you submit. |
GET https://brandiseer.com/api/v2/jobs/:jobId | Poll every 3 to 5 seconds with the same API key. data.status becomes done or failed. Jobs expire after about 10 minutes. Failures refund credits. |
POST https://brandiseer.com/api/v1/generate | Legacy only. proMode boolean. Fast and Pro only. Prefer v2. |
GET https://brandiseer.com/api/v1/credits | JSON includes credits, the current balance for that key. |
GET https://brandiseer.com/api/v1/brands | Brands for the key. Each brand id looks like bds_c_.... |
GET https://brandiseer.com/api/v1/health | { "status": "ok" }. No API key. |
Image body fields: brandId, prompt, optional aspectRatio (1:1, 16:9, 9:16, 4:3), resolution (1K, 2K, 4K), mode (fast, design, or pro; default fast if you omit it), useLogo.
Sync status codes you should branch on: 200 success, 400 bad body, 401 bad key, 402 not enough credits, 404 brand not found, 500 server error.
Done job body: { "data": { "status": "done", "imageUrl", "creditsUsed", "referenceImage" } }. Hand data.imageUrl to the person placing it in Shopify. Failed job body: { "data": { "status": "failed", "error": { "code", "message" } } }.
Cursor and Cowork can wait on a sync Design call when the session allows it. If the HTTP client times out under about 60 seconds, use async and poll. Do not point Shopify at the Brandiseer MCP URL.
Field mapping
| Incoming field | API | Rule |
|---|---|---|
| Slot (PDP hero, lifestyle, collection card, promo) | aspectRatio | PDP, lifestyle, collection card: 1:1. Promo banner: 16:9. Named landscape card: 4:3. Portrait only if the brief asks: 9:16. |
| headline | inside prompt only | On-image text and placement. Not a separate body field. Leave it out when a theme text setting will set the headline. |
| brandId | brandId | bds_c_.... Required. |
| mode | mode | fast, design, or pro. Omit and the API uses fast. Prefer design for product stills. |
| useLogo | useLogo | true or false. |
| subject or brief | prompt | After the rewriter. If the cleaned text has no subject, do not call Brandiseer. |
| resolution | resolution | 1K, 2K, or 4K. Prefer 2K. Drop to 1K if the file would miss the Shopify cap for that surface. |
Example JSON
Use this body for both sync and async. Only the URL and the response change.
{
  "brandId": "bds_c_...",
  "prompt": "Square PDP hero. Single product centred, standing upright, full item in frame. Plain surrounding space. No on-image text.",
  "aspectRatio": "1:1",
  "resolution": "2K",
  "mode": "design",
  "useLogo": false
}
Sync: POST https://brandiseer.com/api/v2/generate. A Design 2K still costs 6 credits, so a success body looks like:
{
  "imageUrl": "https://...",
  "creditsUsed": 6
}
Async: POST https://brandiseer.com/api/v2/generate/async. HTTP 202:
{
  "data": {
    "jobId": "bds_job_..."
  }
}
Poll GET https://brandiseer.com/api/v2/jobs/bds_job_... with the same X-API-Key. When it finishes:
{
  "data": {
    "status": "done",
    "imageUrl": "https://...",
    "creditsUsed": 6,
    "referenceImage": null
  }
}
When it fails (credits are refunded):
{
  "data": {
    "status": "failed",
    "error": {
      "code": "...",
      "message": "..."
    }
  }
}
Ignore referenceImage for delivery. Shopify gets imageUrl (or a file you downloaded from it), uploaded or pasted by a person.
Slot prompts that stay layout-only:
| Slot | aspectRatio | Prompt |
|---|---|---|
| PDP hero | 1:1 | Square PDP hero. Single product centred, standing upright, full item in frame. Plain surrounding space. No on-image text. |
| Lifestyle still | 1:1 | Square lifestyle frame. The same product on a table, one prop beside it. Product fully visible. No on-image text. |
| Collection card | 1:1 | Square collection image. Three products in a row, equal spacing, all fully visible. No on-image text. |
| Promo banner | 16:9 | Wide storefront banner. Product centred on the left third. Empty right half for a heading the theme will set. No on-image text. |
Related use cases
All use casesCreative MCP
Airtable record visuals
An agent generates on-brand stills with Brandiseer for Airtable records (campaign cards, product thumbs, content calendar covers, launch creatives); a person then attaches those files in an Airtable attachment field, or an agent with an Airtable personal access token writes the public imageUrl into that field. Brandiseer does not create Airtable bases and does not sync records by itself.
- MCP
- REST
- Cursor
- Cowork
- Brandiseer
- Airtable
- Cursor
- Claude Cowork
Automation
Always-on creative automation
Zapier, Make, or n8n triggers generate on-brand stills via Brandiseer REST and deliver image URLs downstream (Drive, Slack, Sheets, CMS, email tools).
- REST
- Brandiseer
- Zapier
- Make
- n8n
EmailOctopus newsletter automation
An agent generates on-brand newsletter heroes and promo stills with Brandiseer, and optionally drafts subject line, body copy, and paste-ready HTML; a person places the assets in EmailOctopus and sends. Brandiseer does not create or send EmailOctopus campaigns.
- MCP
- REST
- Cursor
- Cowork
- Brandiseer
- EmailOctopus
- Cursor
- Claude Cowork
Run it with your brand
Connect the workflow to brand memory.
Save your visual identity in Brandiseer, then use MCP or the API to generate from the same brand across every supported workflow.